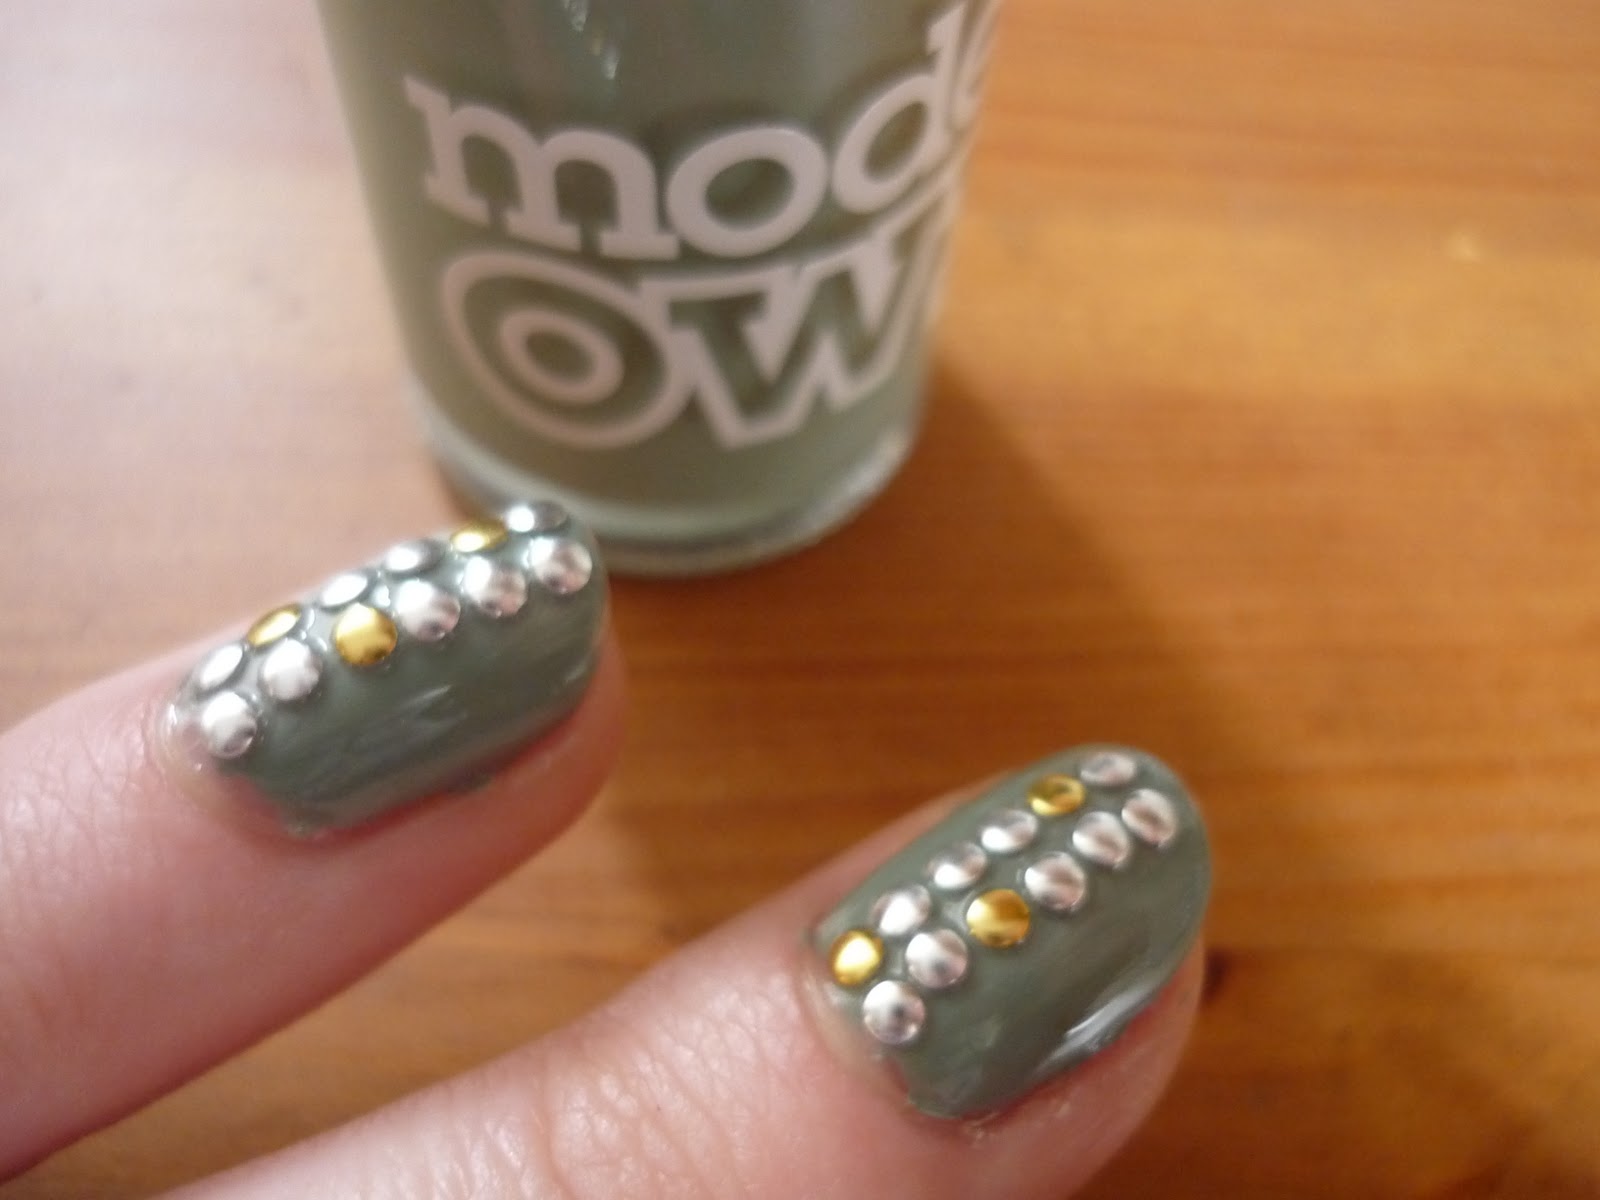
So these are my nails today. The last time I did these nails they were black base coat with gold studs. I was working at Felder Felder at the time and they are all about the studding so thought the nails would go with the dress I wore. Whilst in London I had so many compliments & questions on them so I thought I would write up a tutorial for you.
They are so easy to do & far cheaper than getting your nails done in a salon.
So you will need:
-Base coat of your choice
(I have used Models Own in Grace Green)
-Clear top coat
-Nail studs
(I buy mine from ebay for around £2.50 for 70 studs)
-Cotton ear bud or toothpick
Process:
1) Apply one clear coat & let it dry.
2) Apply colour varnish & let it dry.
(one or two coats depending on the colour)
3) Layout the studs on your desk then one nail at a time, using the clear varnish paint each nail & before it drys add the studs;
To add the studs use the cotton bud (dab the tip in water so it can pick up the studs). Pick up each stud.
You can do any design you like but I like the 2 lines up the middle of the nail.
You need to place each stud carefully & quickly so that the base coat doesn't dry.
Maybe practice a few times before you start on your final design.
4) After completely dry, do one more clear coat on top to set the studs & let dry for as long as it takes.
I wouldn't try this if you are in a rush as they need plenty of time to dry.
And VOILA! Rock chic nails!
I think these nails would look amazing in any colours. Experiment to your style. Enjoy.
xoxo...